
Program:
const int adc1=34;
const int adc2=35;
const int adc3=32;
int value1=0, value2=0, value3=0;
float res1=0, res2=0, res3=0;
void setup() {
Serial.begin(115200);
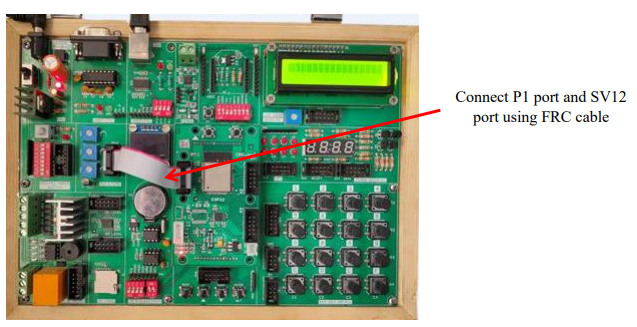
pinMode(adc1, INPUT); // Pins Port1 Connected to ADC Knobs
pinMode(adc2, INPUT);
pinMode(adc3, INPUT);
delay(500);
}
void loop() {
delay(1000);
value1=analogRead(adc1);
value2=analogRead(adc2);
value3=analogRead(adc3);
res1=float((value1*3.3)/4095); //3.3v is maximum voltage applied as a input
res2=float((value2*3.3)/4095); //it is 12bit ADC hence dividing by 4095 gives actual voltage
res3=float((value3*3.3)/4095);
Serial.print("The output of ADC1= ");
Serial.print(res1);
delay(500);
Serial.print("\t The output of ADC2= ");
Serial.print(res2);
delay(500);
Serial.print("\t The output of ADC3= ");
Serial.println(res3);
delay(500);
}
No comments:
Post a Comment