

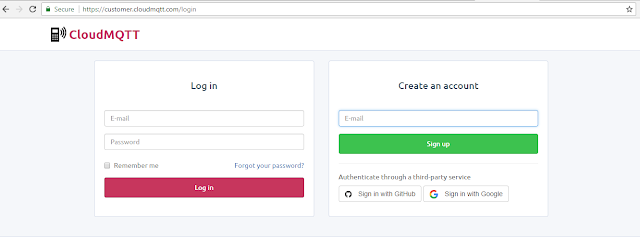
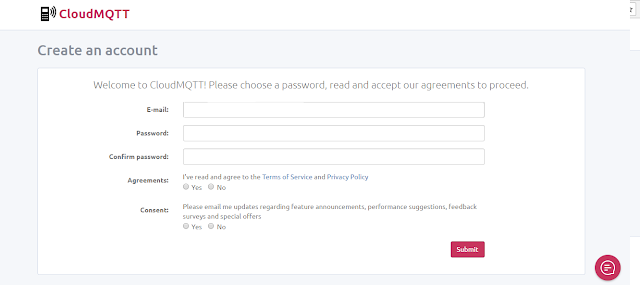
Step1:
Create
an Account in www.cloudmqtt.com
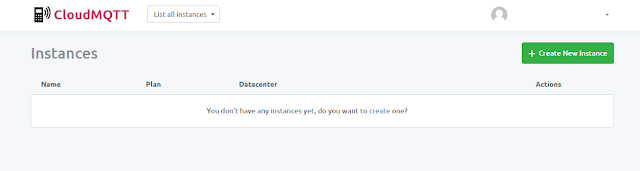
Step2
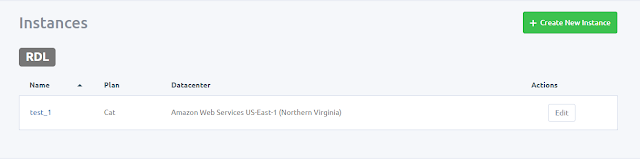
Create an instance which will be used in the program to publish data to the cloud.
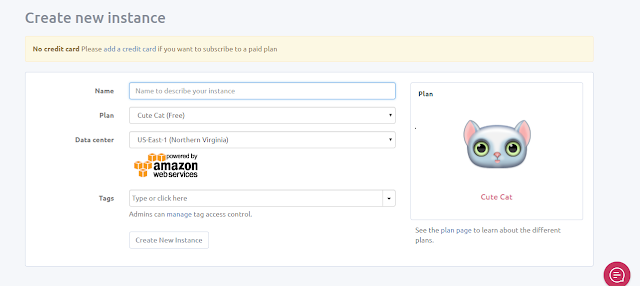
Step3:
Select the Instance name (test_1) and use the details of the same in the code.
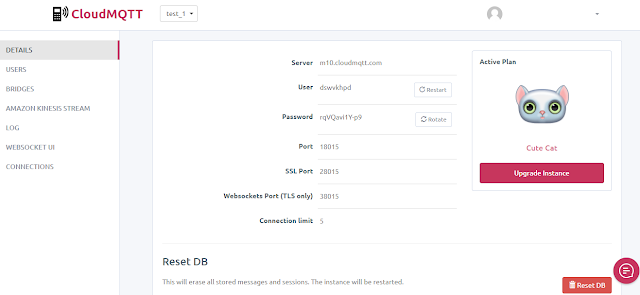
Include the details in the code:

Step4:
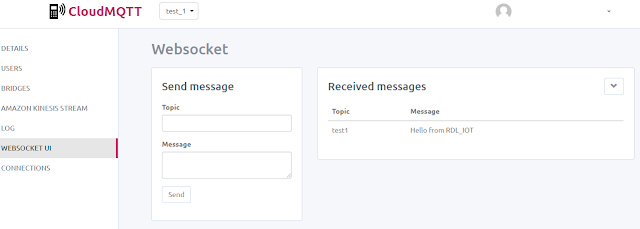
Inorder to send a message to the CloudMQTT, include the line
client.publish("topic_name", "Message");

The message sent will appear in the WEBSOCKET UI of the specified Instance.
Step5:
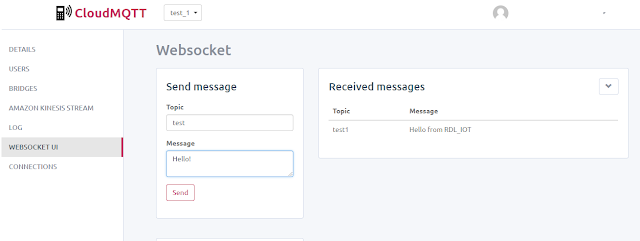
To send data from CloudMQTT ,include the line
client.subscribe("Topic_name");

The same Topic_name should be used in the WEBSOCKET UI as specified in the code while sending the message
Step6:
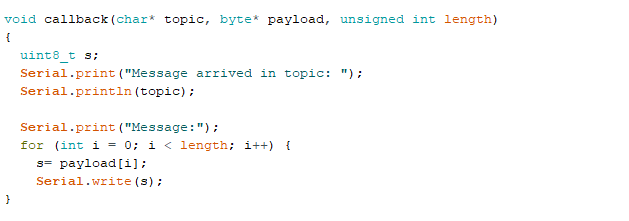
The following code prints the received data from the cloud in the Serial Monitor:

Step7:
The final code establishing connecting between ESP8266 and Cloud MQTT is given below:
FOR ESP8266 BOARD : CLICK HERE


Step2
Create an instance which will be used in the program to publish data to the cloud.


Step3:
Select the Instance name (test_1) and use the details of the same in the code.

Include the details in the code:

Step4:
Inorder to send a message to the CloudMQTT, include the line
client.publish("topic_name", "Message");
The message sent will appear in the WEBSOCKET UI of the specified Instance.

Step5:
To send data from CloudMQTT ,include the line
client.subscribe("Topic_name");
The same Topic_name should be used in the WEBSOCKET UI as specified in the code while sending the message

Step6:
The following code prints the received data from the cloud in the Serial Monitor:


Step7:
The final code establishing connecting between ESP8266 and Cloud MQTT is given below:
#
include <ESP8266WiFi.h>
#include
<PubSubClient.h>
const char* ssid = "Your WiFi
Username";
const
char* password = "Wifi Password";
const
char* mqttServer = "m10.cloudmqtt.com"; // Details from the instance
created
const
int mqttPort = 18015;
const
char* mqttUser = "dswvkhpd";
const
char* mqttPassword = "rqVQavi1Y-p9";
WiFiClient
espClient;
PubSubClient
client(espClient);
void
setup()
{
Serial.begin(115200);
WiFi.begin(ssid,
password);
while
(WiFi.status() != WL_CONNECTED) // Connecting ESP8266 to WiFi
{
delay(500);
Serial.println("Connecting to
WiFi..");
}
Serial.println("Connected to the WiFi
network");
client.setServer(mqttServer, mqttPort);
client.setCallback(callback);
while (!client.connected()) // Connecting to
CloudMqtt
{
Serial.println("Connecting to
MQTT...");
if
(client.connect("ESP8266Client", mqttUser, mqttPassword ))
{
Serial.println("connected");
}
else
{
Serial.print("failed with state
");
Serial.print(client.state());
delay(2000);
}
}
client.publish("test1", "Hello
from RDL_IOT"); // Sending message to Topic "test1"
client.subscribe("test");
//Receives message sent to the topic "test"
}
void
callback(char* topic, byte* payload, unsigned int length) // This function is
used to //print the incoming data
sent to the topic "test"
{
uint8_t s;
Serial.print("Message arrived in topic:
");
Serial.println(topic);
Serial.print("Message:");
for (int i = 0; i < length; i++)
{
s= payload[i];
Serial.write(s);
}
}
void
loop()
{
client.loop();
}
No comments:
Post a Comment